Import Mailchimp Contacts via CSV
From MoHA Wiki
Purpose:
Add, update, and tag contacts in Mailchimp by importing CSV lists.
Steps:
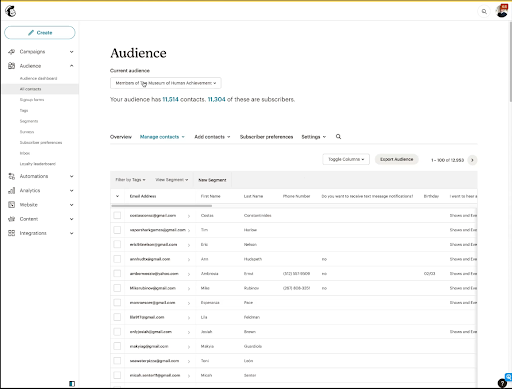
- In Mailchimp, go to the Master Audience list.

- Click Add Contacts > Upload a file.
- Note: You can copy and paste if you don’t want to go through the import process. Using copy and paste is best for quick, simple imports without a variety of fields.
- Select your CSV file. You can use Browse or drag-and-drop.
- “Subscribed” is the default.
- Add contacts to any Groups.
- Groups are additive. For example, if a person is already subscribed to “Shows and Events,” and you select only “Volunteering” they will be subscribed to both.
- Checkmark “Update any existing contacts.”
- Click Continue to Match.
- “Continue to Match” refers to matching column labels to contact fields.
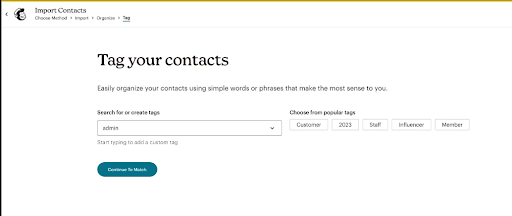
- Because of the amount of tags, it is not recommended to add tags to your contacts on this screen. You can still add tags through the CSV, but this will apply a tag to ALL the contacts you import here.

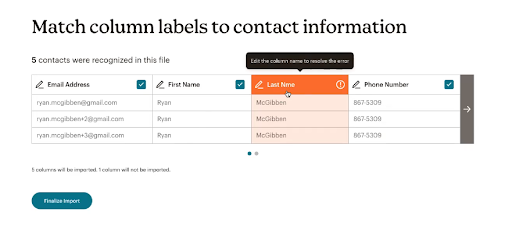
- If there is an error at this step it will appear like this:

- If you click the Orange box (Container Header), you can select the associated field. Mailchimp will guess which field it should be. Once you match, it changes to match the others.
- In the CSV file, if you have multiple tags, put a comma “,” in between each and the system will recognize you are adding multiple tags to that subscriber.

- Uncheck the boxes of any columns/fields you do not wish to import.
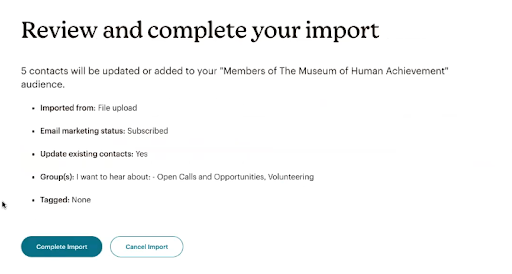
- Click Finalize Import.
- Click Complete Import.
- The Master Audience List is sorted by recently changed, so any added and updated contacts will be at the top for you to review.
- You can also review by going to Import History > Manage contacts > Import History > the most recent CSV.

