Adding a Withfriends Event: Difference between revisions
From MoHA Wiki
mNo edit summary |
mNo edit summary |
||
| Line 7: | Line 7: | ||
*Distribute tickets | *Distribute tickets | ||
*Set ticket prices | *Set ticket prices | ||
<section begin="chapter1" /> | |||
== Steps: == | == Steps: == | ||
#First, submit the [[Creating Staff Events|Staff Event first through Airtable]]. | #First, submit the [[Creating Staff Events|Staff Event first through Airtable]]. | ||
| Line 68: | Line 68: | ||
#*Shows how many tickets are purchased to which tiers. | #*Shows how many tickets are purchased to which tiers. | ||
[[File:Withfriends_TicketTier.png|600px]] | [[File:Withfriends_TicketTier.png|600px]] | ||
<section end="chapter1" /> | |||
== Related links == | == Related links == | ||
*[[Creating Staff Events]] | *[[Creating Staff Events]] | ||
*[[Editing Staff Events]] | *[[Editing Staff Events]] | ||
Revision as of 21:18, April 2, 2024
Purpose:
After the Staff Event is submitted through Airtable, create a Withfriends link for ticketed events. All ticketed events need a Withfriends link. Use a Withfriends link to:
- Create tickets
- Distribute tickets
- Set ticket prices
Steps:
- First, submit the Staff Event first through Airtable.
- Note: Later you’ll need to plug the Withfriends link back into the Airtable.
- Go to: https://withfriends.co/the_museum_of_human_achievement.
- Log in.
- Select My Dashboard.
![]()
- Select Events.

- Select Add Event.
Fill in the following:
- Event Name
- Location
- This autofills to MoHA. You can change it to “online” or add a different location.
- Cover Photo
- Needs to be 720x377 px.
- If you need to reformat, use the staff login for [Canva.com Canva]. Use the “Withfriends Default Size” banner (1440x754px).
- Description
- Grab from the events database. Use the the long description.
- Delete redundant descriptions.
- Ex. “This is at MoHA”
- Tickets
- Match to the information entered in Airtable.
- Free
- Suggested Donation
- Enter suggested donation amount.
- Sliding Scale (with minimum donation)
- For sliding scale with a minimum, set to “Suggested Donation.”
- Enter the max and min range of donation and select “Require minimum donation” box.
- Sliding Scale (with no minimum donation)
- Set Price
- Tickets can be limited by:
- Capacity: amount of that type sold.
- Amount of tickets per purchase: how many can one person/transaction order.
- Multiple types of tickets can be added, either for multiple times, dates, or tiers of tickets.
- Match to the information entered in Airtable.
- Confirmation Message
- This is a message shown only after purchase. Add information restricted only to attendees here, eg. Zoom links, surveys, secret address.
Note: For events that have multiple days of the same thing (eg. plays), put them in the same event. Otherwise, create separate events.
More Withfriends navigation:
- View Guests

- Shows who has a ticket and at what tier.
- To share the guest list, select
 .
.
- Add a Guest

- Select a tier or manually add:
- Name
- Email (optional)
- Quantity
- Upload a guest list via CSV.
- Select a tier or manually add:
- Scan Barcode

- Use this to scan people’s ticket links on mobile.
- Ongoing Members of MoHA

- Download CSV of all Attendees

- Email all Attendees

- Note: Instead of using the Withfriends email system - download CSV, copy emails, and send a direct email. Put all emails in BCC.
- View Report
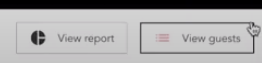
- Shows how many tickets are purchased to which tiers.


