Use Canva to Make Graphic Assets: Difference between revisions
From MoHA Wiki
(Created page) |
(Added images pt1) |
||
| Line 6: | Line 6: | ||
== Find & Edit Canva Templates == | == Find & Edit Canva Templates == | ||
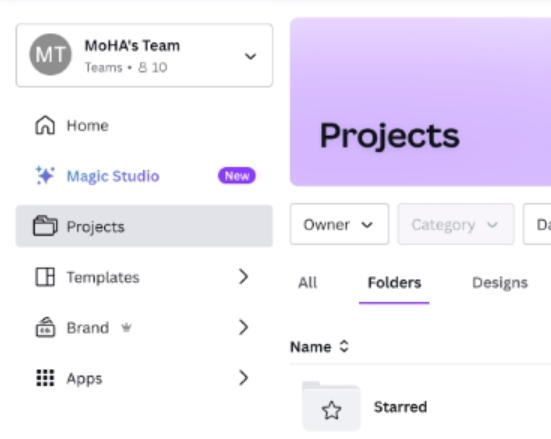
To complete the activities described in this article, sign in to the MoHA Canva account. Most of the functionality described here is found on the left side of the home page, in either the “Brand” or “Projects” tab. | To complete the activities described in this article, sign in to the MoHA Canva account. Most of the functionality described here is found on the left side of the home page, in either the “Brand” or “Projects” tab. | ||
[[File:Canva Projects Tab.png]] | |||
'''Note:''' Canva puts their pre-built templates in the “Template” menu. No MoHA templates are inside that tab. | '''Note:''' Canva puts their pre-built templates in the “Template” menu. No MoHA templates are inside that tab. | ||
=== Brand/Brand Kits === | === Brand/Brand Kits === | ||
# In Canva, on the left of the homepage, select '''Brand'''. | # In Canva, on the left of the homepage, select '''Brand'''. | ||
#:[[File:Canva Brand Brand Kit.png]] | |||
# To find assets for all MoHA Programs, select '''Brand Kits'''. | # To find assets for all MoHA Programs, select '''Brand Kits'''. | ||
# You can navigate the Brand Kit by either: | # You can navigate the Brand Kit by either: | ||
#* Scrolling | #* Scrolling | ||
#* On the left panel, select categories | #* On the left panel, select categories | ||
#:[[File:Canva Brand Kit Categories.png]] | |||
==== Categories in the Brand Kit ==== | ==== Categories in the Brand Kit ==== | ||
| Line 40: | Line 44: | ||
#* Inside this folder, each program has its own template. | #* Inside this folder, each program has its own template. | ||
#** Each program has three different layouts. | #** Each program has three different layouts. | ||
#::[[File:Canva Project Folders.png]] | |||
#::[[[[File:Canva Project Folder Template.png]] | |||
# To the right of the template, click '''...''' > '''Make a copy'''. Your copy appears at the top, select it to edit. | # To the right of the template, click '''...''' > '''Make a copy'''. Your copy appears at the top, select it to edit. | ||
[[File:Canva Make a Copy.png|500px]] | |||
#* '''Do Not:''' Edit the template directly. Doing so saves on top of the template. Make a copy instead. | #* '''Do Not:''' Edit the template directly. Doing so saves on top of the template. Make a copy instead. | ||
# In your copy, select the page you want to edit. | # In your copy, select the page you want to edit. | ||
#* At the top right, delete the pages you're not editing with the Trash Can icon. | #* At the top right, delete the pages you're not editing with the Trash Can icon. | ||
[[File:Canva Trash Can.png]] | |||
== Editing Tips & Tricks == | == Editing Tips & Tricks == | ||
=== | === Edit an Element === | ||
*Single click: Select the element. | *Single click: Select the element. | ||
*Double click: Edit the element. | *Double click: Edit the element. | ||
| Line 58: | Line 64: | ||
*To select features in the Brand Kit, in the lefthand bar, select '''Brand'''. | *To select features in the Brand Kit, in the lefthand bar, select '''Brand'''. | ||
'''image''' | '''image''' | ||
=== Adding Images === | |||
*Canva is good at lining images up to match other elements. To place an element: | *Canva is good at lining images up to match other elements. To place an element: | ||
**Onto a blank template, or to match preexisting alignment: Drag the edges to match the other elements on the page, and the element will align, showing spacing. | **Onto a blank template, or to match preexisting alignment: Drag the edges to match the other elements on the page, and the element will align, showing spacing. | ||
| Line 63: | Line 70: | ||
***'''image''' | ***'''image''' | ||
**To replace an element, drag the new one to where the current one is. It will automatically replace it while keeping the sizing and placement the same. | **To replace an element, drag the new one to where the current one is. It will automatically replace it while keeping the sizing and placement the same. | ||
=== Using Templates === | |||
*Templates should contain the correct fonts and logos for the corresponding programs. | *Templates should contain the correct fonts and logos for the corresponding programs. | ||
*Files can be named in the top right next to the share and statistics icons. | *Files can be named in the top right next to the share and statistics icons. | ||
| Line 68: | Line 76: | ||
'''image''' | '''image''' | ||
*Canva saves automatically (like Google Docs), so the user does not need to save. | *Canva saves automatically (like Google Docs), so the user does not need to save. | ||
==== Saving Your Project ==== | |||
*To download, at the top right, click '''Share'''. | *To download, at the top right, click '''Share'''. | ||
'''image''' | '''image''' | ||
Revision as of 15:27, June 1, 2024
Purpose
Canva is the program that MoHA uses for graphic design, including sponsorship documents and program overviews. This article contains:
- How to find/edit Canva templates.
- Editing tips and tricks.
Find & Edit Canva Templates
To complete the activities described in this article, sign in to the MoHA Canva account. Most of the functionality described here is found on the left side of the home page, in either the “Brand” or “Projects” tab.

Note: Canva puts their pre-built templates in the “Template” menu. No MoHA templates are inside that tab.
Brand/Brand Kits
- In Canva, on the left of the homepage, select Brand.
- To find assets for all MoHA Programs, select Brand Kits.
- You can navigate the Brand Kit by either:
- Scrolling
- On the left panel, select categories


Categories in the Brand Kit
| Type | Description |
|---|---|
| Logos | Logos for each MoHA program, all variations. Make sure to select the correct variation. |
| Colors | Color Families for each MoHA program. |
| Fonts | Fonts are specified by program, but if uncertain, use PT Sans. |
| Photos | Includes any photo MoHA has uploaded to Canva. |
| Graphics | QR codes for the Wiki pages for each program.
|
Projects
- In Canva, on the left of the hompeage, select Projects.
- Select Folders > Templates.
- Inside this folder, each program has its own template.
- Each program has three different layouts.
- [[
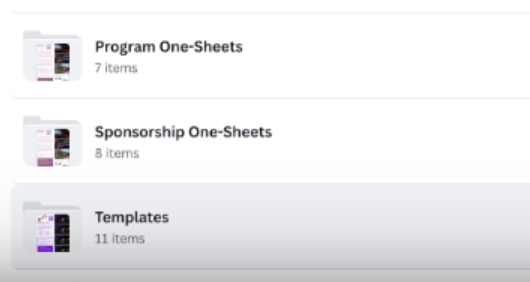
- Inside this folder, each program has its own template.
- To the right of the template, click ... > Make a copy. Your copy appears at the top, select it to edit.


- Do Not: Edit the template directly. Doing so saves on top of the template. Make a copy instead.
- In your copy, select the page you want to edit.
- At the top right, delete the pages you're not editing with the Trash Can icon.

Editing Tips & Tricks
Edit an Element
- Single click: Select the element.
- Double click: Edit the element.
- An editing menu opens on the left.
- To delete an element, use the delete key on your keyboard or click the Trash Can icon.
image
- To select features in the Brand Kit, in the lefthand bar, select Brand.
image
Adding Images
- Canva is good at lining images up to match other elements. To place an element:
- Onto a blank template, or to match preexisting alignment: Drag the edges to match the other elements on the page, and the element will align, showing spacing.
- Note: The edges of the element “snap” to where other things are, and give measurements, like below.
- image
- To replace an element, drag the new one to where the current one is. It will automatically replace it while keeping the sizing and placement the same.
- Onto a blank template, or to match preexisting alignment: Drag the edges to match the other elements on the page, and the element will align, showing spacing.
Using Templates
- Templates should contain the correct fonts and logos for the corresponding programs.
- Files can be named in the top right next to the share and statistics icons.
- Sponsorship documents use the following convention: [Program name] [Sponsor Name] [Year]
image
- Canva saves automatically (like Google Docs), so the user does not need to save.
Saving Your Project
- To download, at the top right, click Share.
image
- When you finish editing, move the file to the proper location:
- In the top left, click File > Move to Folder > Sponsorship/Program > Move.
image
- “Sponsorship” files are focused on obtaining funding, whereas “Program” files are more generally about the program.
- Continue clicking into folders until you find the correct folder for the asset you created.
image